
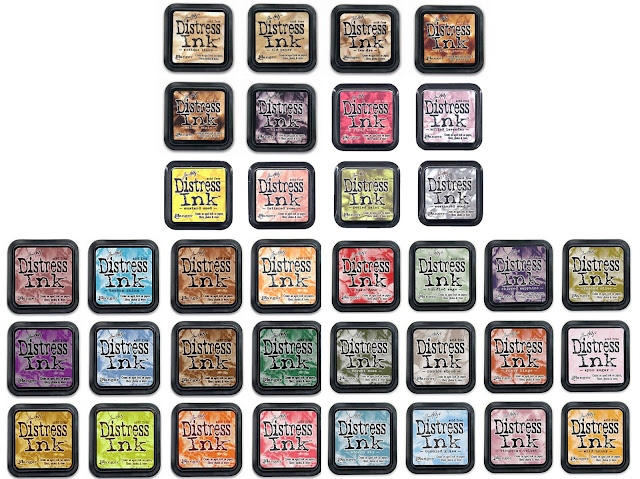
As we have at the moment Tim Holtz Distress Ink Pads ON SPECIAL for ONLY $6.99, here are some tips for using them. Here are some good reasons for you to own a very nice palette of colours.
STAYS WET LONGER - (which allows you to blend and shade on paper, grunge & photos – also emboss) other dye inks on the market dry too fast especially on photos so you end up with lines and marks if you adhere direct from the pad.
COLOR WICKS OR SPREADS OUT - (distress inks will travel across the surface of your paper when slightly spritzed with water) other dyes do not travel as much although they might bleed a little when wet, Tim’s Distress Inks “wick” or spread out alot further creating several tone on tones. Giving the best distressed look I have seen.
COLOR STABILITY - (the colors of the Distress Inks will not fade and break down when watered or heated allowing you to have more color control for the finished look of your project) other brown colored dyes will break down when water is added leaving you wit a pink & green hue.
There are so many different ways to use these inks or should I say endless possibilities to use Tim Holtz Distress Ink Pads.
1. TO DISTRESS:
Tim says, ‘I like using water when I am distressing. I think it gives the papers more of a weathered texture, so here’s how I start.’ Working on any type of paper (manila,cardstock, or text weight), crumple the paper up – always press in the center of any heavyweight cardstock or manila stock – this will break the surface tension of the paper and allow you to crumple up the paper easier without tearing it.
Next rub the Distress pads over the surface – you can work with several different colors or just one – Walnut Stain is ideal for this method. Then spray the inked surface with water, using a mini mister or tiny spray bottle.(you will notice the ink travelling outward when water is applied as these inks are designed to react with water).
Now heat the surface to dry – and here’s why… Although you don’t have to Heat Set these inks for any reason, I like to dry the water using either my Heat-It Craft Tool or an iron. This will allow for more tone control and keep areas dark and others light. Ironing the paper will also give you a much smoother surface to stamp on without compromising the aged finish. See on top some Faded Jeans distress stickles was used from Tim Holtz. You can easily dry the Distress Stickles with a heating tool, so no more waiting!
*Note If you allow the surface to air-dry most of your color will end up on the edges only because the paper will bend and buckle when wet, automatically forcing the ink and water to the edges.
Also notice that these Distress Inks retain their beautiful color value even when wet and dried.
2. WRINKLE FREE DISTRESSING:
To create the look of aged papers, from times gone by, without all the lines and wrinkles – give this a try. Working on your non-stick Craft Sheet, begin by directly applying various colors of Distress Ink Pads to the surface of the Craft Sheet. A couple of swipes of a color or two will do the trick (you might also try using an original color of Distress Ink along with a new one!).
Get out your Distress Re-Inkers Inks if you want to add a bit of intense color for the ultimate vintage look. I like using Walnut Stain or Vintage Photo for this, so remove the glass dropper from the bottle and drag it across the inked Craft Sheet – do not squeeze any drops of ink as it will take over everything!
Next slightly mist the Craft Sheet with water to allow the inks to begin mixing and blending – usually 3-4 sprays is plenty. Then take your paper or tag and place in directly on the inked Craft Sheet and lift it off. If you have any un-inked areas simply place that area of the paper on any left over inks on the sheet.
Finally dry your paper or tag using an iron or a Heat-It Craft Tool ( if you allow your papers to air dry they will curl and force most of the ink to the edges so I prefer to heat them to dry.). To finish your attic-fresh look, ink the edges with Distress Inks using a piece of Cut n’ Dry Foam.
3. VINTAGE PHOTOS:
Whether you’re a scrapbooker or not you can use all types of photos (vintage or new ones) on your cards and pages.
The Distress Inks work on all types of photos – inkjet, laser, toner copies, regular photos (matte or glossy) and even color photos! Start by using the lightest colors ANTIQUE LINEN or OLD PAPER with a brayer. Cover the photo in the lighter colors, blend the colors with a small piece of Cut n’ Dry Foam after you apply the inks – these inks stay wet long enough for you to blend out any lines or marks other ink pads leave on photos. Next age the edges with VINTAGE PHOTO or WALNUT STAIN by applying the pad directly to the edges – soften and mix the tones with a small piece of Ranger Cut ‘n Dry Foam.
I do not know whether it's just me or if perhaps everybody else experiencing
ReplyDeleteissues with your blog. It appears like some
of the text in your posts are running off the screen.
Can somebody else please comment and let me
know if this is happening to them too? This might be a problem with my internet browser because
I've had this happen previously. Thanks
Also visit my web blog; download media player
Thanks for your feedback. I think it may be your browser.
ReplyDelete