Showing posts with label card. Show all posts

Monday, 20 January 2014

Dylusions Inks on Gloss Card by Susan Butler.

Hello Everyone.
Week three and another Bg with the Dylusions Ink Pad and this time I have used Gloss Card as my base.

Placing the stencil direct onto the inked up pad, lay the Gloss card on top of this and press down firmly. You can repeat with a different stencil to create layers, or you can also spray some water on top of the paper as well, you can see the different effects with the two types of paper below.

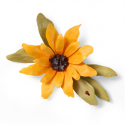
I have shown you both effects, as I used the watercolour paper for my flowers on this Card.
Gosh I love this so much...it is so random, the effect every time you did it would always be slightly different; one off's.
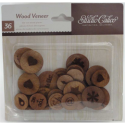
You can see the different stamps I used to create some depth.
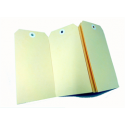
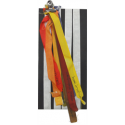
 Dyeing the seam binding.
Adding the stitching and cutting the Flowers.
Stamped a sentiment on tissue paper, only because each time I went to do it on the Gloss card it slipped and smudged...Grrr!
Glue down with multi-medium matte.
Complete the spray and attach to the card.
 One finished card.

 I am loving the effects on the Gloss card. 
Join me next week for another technique with this Ink Pad.

Have a great day,
Smiles:)
Sue


Products used:


Monday, 6 January 2014

Using the Dylusions Ink Pad to make Backgrounds by Sue Butler

Hello Everyone,
Over the next few weeks I will show you how versatile the Dylusions Ink Pad is to make wonderful Backgrounds for all your creations.
I have made a card out of a shipping Tag today but you will soon realise that this technique can be adapted to suit any project. 
A word of warning this can be MESSY!!!!

There is a tutorial on how to season the pad here.
First step is to Ink the pad with your choice of colours to make the palette.

You will get the Ink all over the place, but don't fret, mop it up with a baby wipe and swipe or dab into your journal or another shipping Tag, like what I have done here, every time I stamped or stencilled I cleaned the tools off onto this journal page.

Back to my Background; using a stencil face down onto the pad, place the shipping Tag on top and press down firmly.
Add some different size circles-direct from Pad to Tag.
 Polish the Tag with a Baby wipe.
  Stamp some images.

Continue to layer up until you are happy, then add some texture.
Dry emboss, texture paste,stitching etc.

 Adding the elements to create interest, then as I like to say;
 titivate with some shading and doodling.

Finished Card.
All products are available at Scotties shop, if sold out Adrienne will more than happy to order in for you.

Next week a different effect.
Smiles:)
Sue


Friday, 13 December 2013

Tea Break Card - By Kimi


Hello again bloggers, I have a quick little card share for you all today.  I am coming to the end of my November kit....yes I know it is December already, but shhhhhhh we won't mention that will we?  I have cheated a little bit readers and used a card base....you know the blank ones that you can buy.  I have used a cream coloured packet.  Be sure to check out Scottie Crafts  for their range of colours.


I have used the last bits from the Choc Chip and adhered them to my card base.  I then added some apricot coloured ribbon along with two layers of lace.  I created my corner cluster with a paper doily and a diecut from the Spellbinders Beaded Ovals die.  I left the cut in the die and lightly inked up the exposed areas to give me the two different tones with Tim Holtz Victorian Velvet Distress ink. I also added a rubon sentiment from the collection.


I have layered up the corner of the card with some cuts from the Sonora Rose Memory Box Die, which you can only just see as I then added some mulberry paper flowers from my stash and a couple of little Prima flowers.  I then finished off the layers with the little lady from the Collectables.


Well bloggers that's it from me this week. A very quick share indeed!!  Thanks again for joining me   
Till next time remember to .....
.....✿ღ.~♥  Live your Bliss ♥~ღ.✿

Monday, 18 November 2013

'Delight' full card by Sue Butler.

Good Morning 
Today I have made a card from the Prima 'Delight' collection,  these are great papers to make cards with that stand the test of time.


As usual I have a lot going on, so I will take you through the process on how I designed it, and you will realise that it is not too complicated!

Diecut and dry emboss the background (Bg) papers.


Diecut some Flowers and ink up.

Diecut a Flourish from the Prima paper


Paint up the frame.


This is the messy bit!


Make up the arrangement of Flowers and add a Prima Chipboard, doilies and lace.


Balance the design by placing another element in the opposite corner.


One finished Card.

All products are available at Scottie Crafts, and if they are sold out don't worry, Adrienne will always order in any item for you that you require.
Have a great week,
Smiles:)
Sue