Showing posts with label Dylusions Ink pad. Show all posts

Monday, 13 January 2014

Journal Page by Sue Butler

Hello Everyone,
If you read my last post you will know that I am working with the Dylusions Ink Pad and in my previous post I mentioned that I stamped my excess inks into a Journal, now I have to admit that this is the first Journal page I have ever designed, so it was a learning curve for me as well. I worked very hard at not thinking too much on what the result would look like, but trying to express my thoughts on the page for this particular day----hence the expression that I have written.


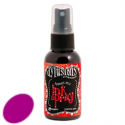
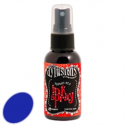
The Background was made with the Dylusions Ink Pad by stamping off my stamps, stencils and wiping with baby wipes,

Stamping,  gesso and a paper border is the next layer.
Free hand Flower drawing, doodling, butterflies and pencilling in the sentiment.
Apologies for the lighting in some of the photos.

Highlighting with a White Pen, embossing paste and a metal embellishment completes the look.


I am liking the effects that the multi colours make from the pad, the dylusions Inks are bright and happy, as opposed to when I use watercolour or Acrylics for my backgrounds, which are more subtle.
Check back next week for a different look again.
Hope you are having a great day,
Smiles:)
Sue


Monday, 6 January 2014

Using the Dylusions Ink Pad to make Backgrounds by Sue Butler

Hello Everyone,
Over the next few weeks I will show you how versatile the Dylusions Ink Pad is to make wonderful Backgrounds for all your creations.
I have made a card out of a shipping Tag today but you will soon realise that this technique can be adapted to suit any project. 
A word of warning this can be MESSY!!!!

There is a tutorial on how to season the pad here.
First step is to Ink the pad with your choice of colours to make the palette.

You will get the Ink all over the place, but don't fret, mop it up with a baby wipe and swipe or dab into your journal or another shipping Tag, like what I have done here, every time I stamped or stencilled I cleaned the tools off onto this journal page.

Back to my Background; using a stencil face down onto the pad, place the shipping Tag on top and press down firmly.
Add some different size circles-direct from Pad to Tag.
 Polish the Tag with a Baby wipe.
  Stamp some images.

Continue to layer up until you are happy, then add some texture.
Dry emboss, texture paste,stitching etc.

 Adding the elements to create interest, then as I like to say;
 titivate with some shading and doodling.

Finished Card.
All products are available at Scotties shop, if sold out Adrienne will more than happy to order in for you.

Next week a different effect.
Smiles:)
Sue